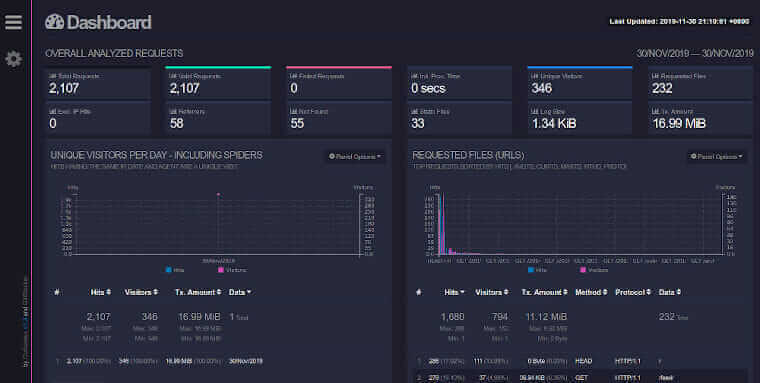
I’ve made quite an effort to protect my users’ privacy on this site but, to help me write more effectively, I still need some sort of analytics. Given the privacy requirement and my efforts to leave big tech behind, I haven’t had any analytics on site traffic since I re-launched the site in August 2019. Today that changes. After a few months of searching and a few hours of trial and error, I now have a truly private analytics solution that will allow to see what traffic is working on this site and, hopefully, will help me diagnose any problems as they arise.
GoAccess, The Holy Grail of Analytics
To re-introduce analytics on this site I had a few criteria.
- It has to be private. I’m already anonymizing nginx logs and deleting those daily, I don’t want to collect any more data than those already are.
- No JavaScript. It took a lot for me to remove all the JavaScript in the first place. I’m not ready to backtrack on that yet.
- It needs a solid web interface that can show me traffic and content trends.
- Preferrably no monthly subscription. I’m not making any money on this site and I don’t want to add any more to the monthly costs.
Enter GoAccess. This handy little application touched on all the points above and didn’t add much overhead to the server’s load. I’m now running it on this and my code site and all seems to be going well. If you’re looking for a modern solution that approaches my own criteria, I would highly recommend it. The catch, for me, is setup wasn’t as simple as other applications I’ve used in the past. In the end it took a few days of trial and error as well as opening an issue on GitHub for me to get it right.
Setting up GoAccess on Ubuntu
To avoid inflicting on others the issues I saw installing it, here’s my working setup:
Install GoAccess
The first thing you need to do is install it. Begin by setting up the repo per the official instructions. Don’t run the apt-get install goaccess step yet. Just install the repo and then run the following:
sudo apt-get install goaccess-tcdCode language: Bash (bash)The difference here is the normal goaccess package won’t let you save your reports to disk so the risk of losing the data is too high.
Setup your sites for GoAccess
Once installed you can simply run the app as in the official documentation but that probably isn’t going to be the most efficient way to do it. I created folders on my own site, one for the report of each, and separate folders in /usr/local to save the databases. Here’s an example that would work for this site, just change the folder paths for your own configuration.
mkdir - /var/www/analytics/chriswiegman
mkdir -p /usr/local/goaccess/chriswiegmanCode language: Bash (bash)
Of course you’ll want to change the “chriswiegman” part of the folder names. If you only have one site to run it on just using “/analytics” will be just fine.
Setup a cron job to run GoAccess
Next, we’ll actually need to setup a cron job to run GoAccess. Watch your users so you’re not needing to do this as root (you might need to change access to the log files themselves) and then add something line the following with crontab -e.
* * * * * goaccess /var/log/nginx/access.log -a --keep-db-files -o /var/www/analytics/chriswiegman/index.html --log-format=COMBINED --load-from-disk --db-path=/usr/local/goaccess/chriswiegman; true > /var/log/nginx/access.logCode language: Bash (bash)This is a bit more than what the official documentation normally recommends so lets break it down a bit:
* * * * *run it every minute. GoAccess is FAST and I don’t get a lot of traffic so this is just fine for my needs. Adjust for yourself as necessary.goaccess /var/log/nginx/access.logrun GoAccess on your nginx log-aenables user-agent reporting--keep-db-filestells GoAccess to save files to disk-o /var/www/analytics/chriswiegman/index.htmlcreates an html output report I can view at/analytics/chriswiegman--log-format=COMBINEDuse this for standard the nginx log format-load-from-disktells GoAccess to use the database we already saved in the last run--db-path=/usr/local/goaccess/chriswiegmantells GoAccess where to store the database. This is very important!!! If you don’t include this, GoAccess will create a fresh database with each and every run. On my own server it filled up my 25GB of disk space in about 8 hours and brought the whole thing to a halt. Specifying where to save that database will save you that headache.; true > /var/log/nginx/access.logclear out the nginx log after running. This is the result of my 2nd headache. Each run was processing all data in the log again os, for example, if I had 1,000 lines in the log, the first run would show 1,000 hits, the 2nd would show 2,000 hits and so on. I opened a GitHub issue on it and within about 2 hours was pointed to this solution but I had a hard time getting it to work. Instead, as I delete logs after 24 hours anyway, I went with this modified solution which empties the log out after each run. This may or may not work for.
Prevent unauthorized access to the report itself
Finally, we need to make sure we lock down the report itself. This will only work if you have access to a static IP, such as a VPN. We need to edit the nginx vhost and add the following:
location ^~ /analytics {
    access_log off;
    allow 111.111.111.111;
    deny all;
}
Simply replace the IP in the block with your static IP and your analytics will be locked down to you alone. Bonus, it won’t log analytics access either.
Don’t forget to restart nginx after modifying your config:
sudo service nginx restartCode language: Bash (bash)Enjoy your analytics
That’s it. Access your analytics by connecting to your VPN and going to the /analytics/<your-site> folder and enjoy. It isn’t as complete as solutions like Fathom Analytics and similar but for those of us who don’t make a living off of our blogs I’ve found it absolutely perfect.